Building My First NAS
(updated )
I’ve been using a Synology DS918+ as my NAS and main machine that I selfhost various media services from. It works so well that I hardly think about it, which is exactly what I want out of my NAS.
In April, the DS918+ died abruptly without warning after 5 years of service. There was a burnt smell, and it wouldn’t power on anymore. It was no longer under warranty, and I wasn’t sure if replacing the power brick would fix the problem. Hence, I decided to try building my own DIY NAS to replace the DS918+. I hoped that a DIY build would lead to easier repairs if anything broke and saving money compared to buying a ready to use NAS. In this post, I’ll share the triumphs, pitfalls, and lessons learned along the way.
Table of Contents
- Requirements
- Parts List
- Assembly
- Was DIY Worth It?
- Operating System
- Power Consumption
- Mistakes
- Future Build Ideas
- Conclusion
- Epilogue
Requirements
- Time: I wanted to get my replacement NAS working as quickly as possible and gave myself a weekend to research and buy the parts. I was prepared for individual hard drives to fail but was completely unprepared for the NAS itself to die so abruptly. I had daily backups, so didn’t have to worry about data loss. What I did not consider was the inconvenience of not having the services I selfhost available, since I’ve built my digital life around it. For example, a selfhosted instance of Seadrive keeps files like my password database synced between devices. I also didn’t have access to my media collection.
- Cost: I didn’t have a strict budget in mind but didn’t want to spend too much. Since this was the first time that I’ve built my own PC, I expected to make mistakes, so I wanted to make less expensive mistakes if possible. Since the DS923+ succeeds the DS918+, I had S$779, the cost of the DS923+ as a rough benchmark.
- Idle power draw: the NAS would spend most of its time waiting for requests in an idle state. Hence, I wanted the system (excluding spinning hard drives) to have an idle power draw of under 20W. This was very important to me, since electricity here in Singapore is expensive.
- Better CPU: the CPU in the DS918+ is really weak, so I wanted something better.
- Noise: since the NAS was going to be in the living room, it had to be quiet for a reasonable family acceptance factor.
- Footprint: the space I had to work with is pretty compact, so that limited the dimensions of the case that I could use.
Parts List
CPU: AMD Ryzen 5700G
I wanted an AMD CPU for their better power efficiency when under load. However, AMD’s desktop CPUs consume a lot of power at low loads, idling at 20W and above. AMD’s APUs (G series CPUs) are based off laptop CPUs, so are much more power efficient at low loads. As an added bonus, they have integrated graphics, making it possible to use a display during the initial OS install without a dedicated graphics card.
Hence, I got a Ryzen 5700G from Amazon for S$271.44. With 8 cores that boost up to 4.6 GHz and a 65W TDP, it should be more than enough for NAS purposes while being easy to keep cool.
I considered the Ryzen 8000G APUs. However, they require investment into the newer AM5 platform and DDR5 memory, which would have been more expensive. I found out later that the Ryzen 8000G APUs don’t support PCIe bifurcation, so I dodged a bullet there, more on bifurcation later.
If I needed accelerated video transcoding for Plex, I would have gone for an Intel CPU, which can idle very efficiently. Here’s an example of an Intel NAS build optimized for low idle power consumption.
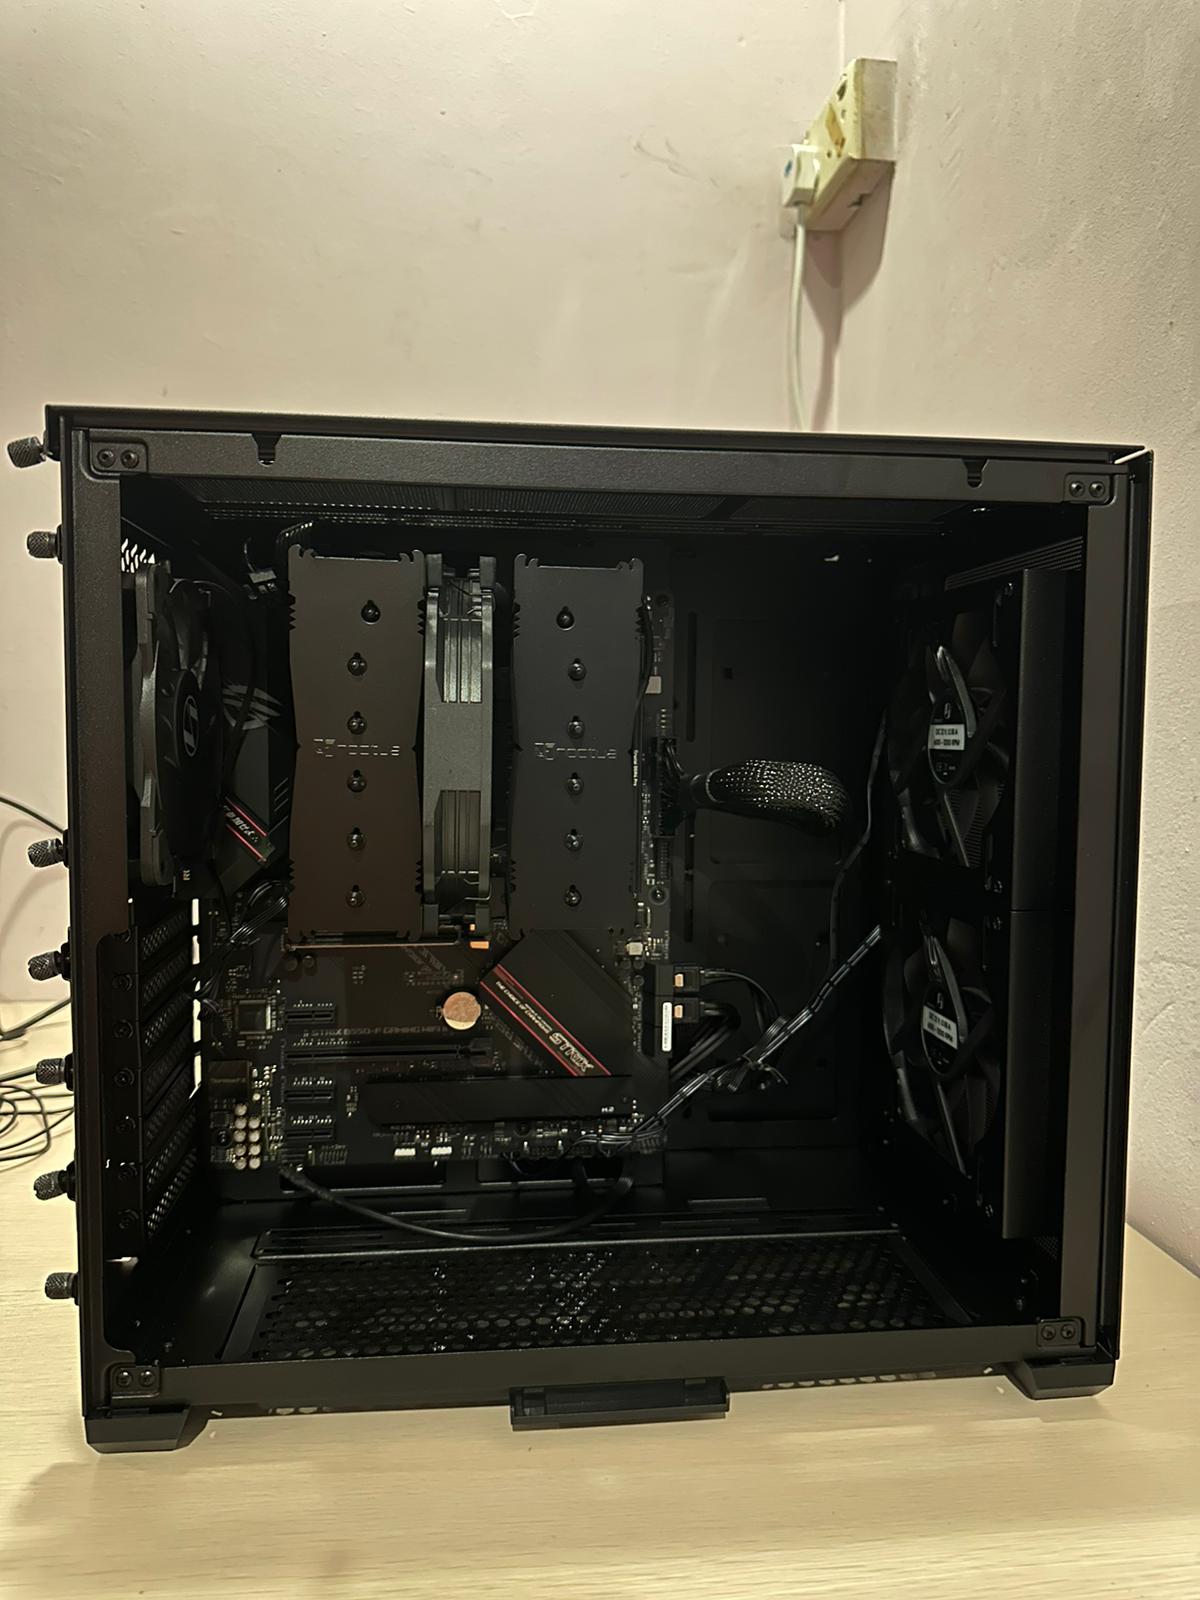
Motherboard: Asus ROG Strix B550-F Gaming WiFi II
I went with an ATX motherboard for more expandability. I wanted 2.5GBE ethernet and at least 4 SATA ports to connect the 4 hard drives from the DS918+.
I wanted a motherboard that used AMD’s B-series chipsets, since they have a TDP of 7W, compared to 15W for the X-series chipsets. That meant something with the B550 chipset for compatibility with the Ryzen 5700G.
Some motherboards may draw more power than needed by not allowing the CPU to enter deeper sleep states. The German hardwareluxx community has collected data on builds that idle efficiently. Based off that data, I got an Asus ROG Strix B550-F Gaming WiFi II for S$254.61. I didn’t need the integrated Wi-Fi, but it was priced the same as the non Wi-Fi version when I bought it from Amazon.
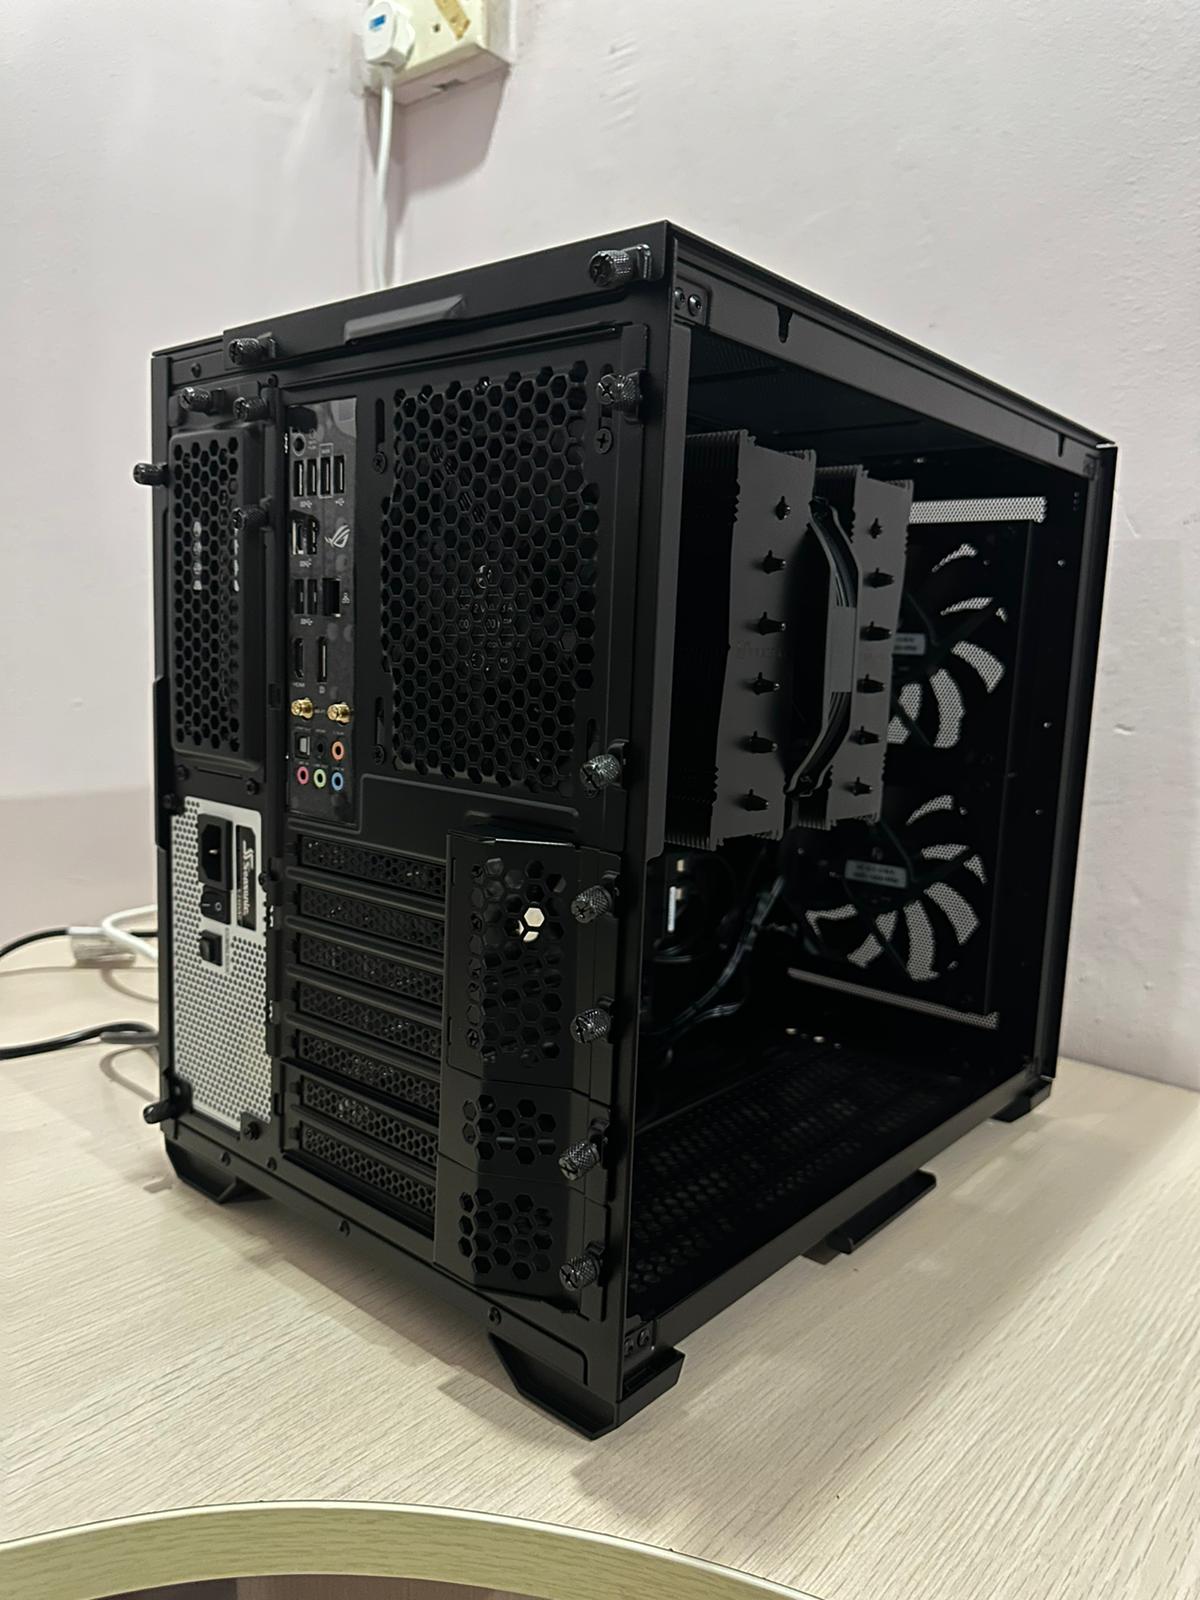
Case: Lian Li O11 Air Mini
It was tough to find a compact ATX case that supports 4 3.5” hard drives that would fit into the space I had in mind. The Lian Li O11 Air Mini had good reviews and seemed to tick my boxes.
As soon as I tried to actually assemble the machine, I immediately regretted the S$146.6 spent on this case. Though Lian Li claims support for 4 3.5” hard drives, it is practically impossible to use the mounting point below the front I/O panel. There is insufficient clearance for the cables coming down from the I/O panel and the top of the drive, as well as between the drives for running data and power cables to them. Unfortunately, I only saw the online reports of this problem after getting the case.
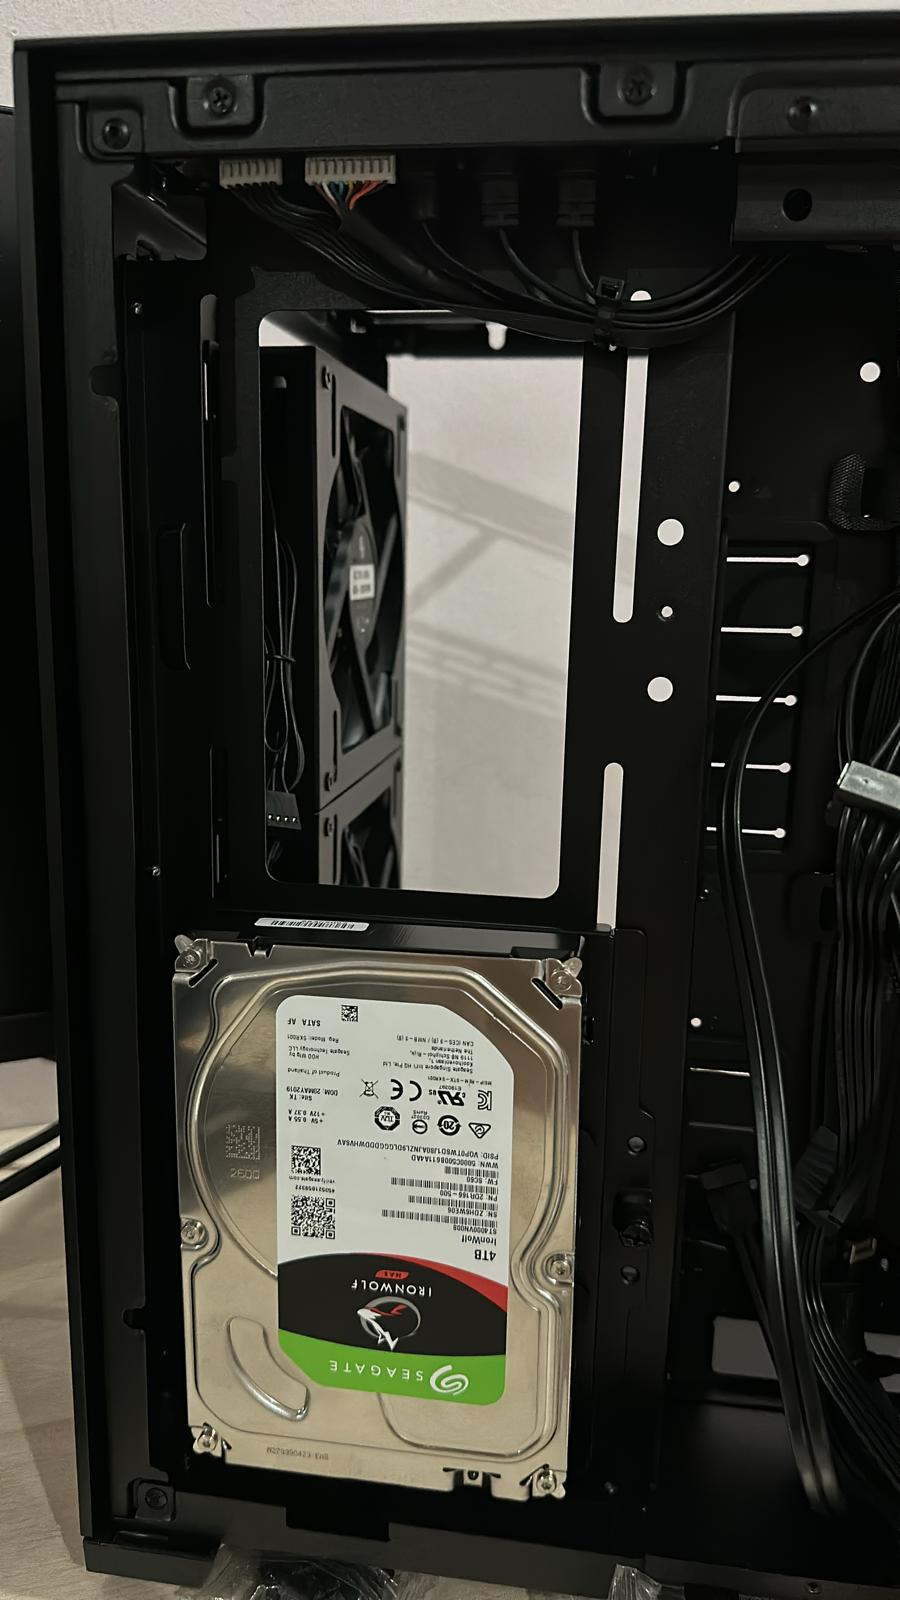
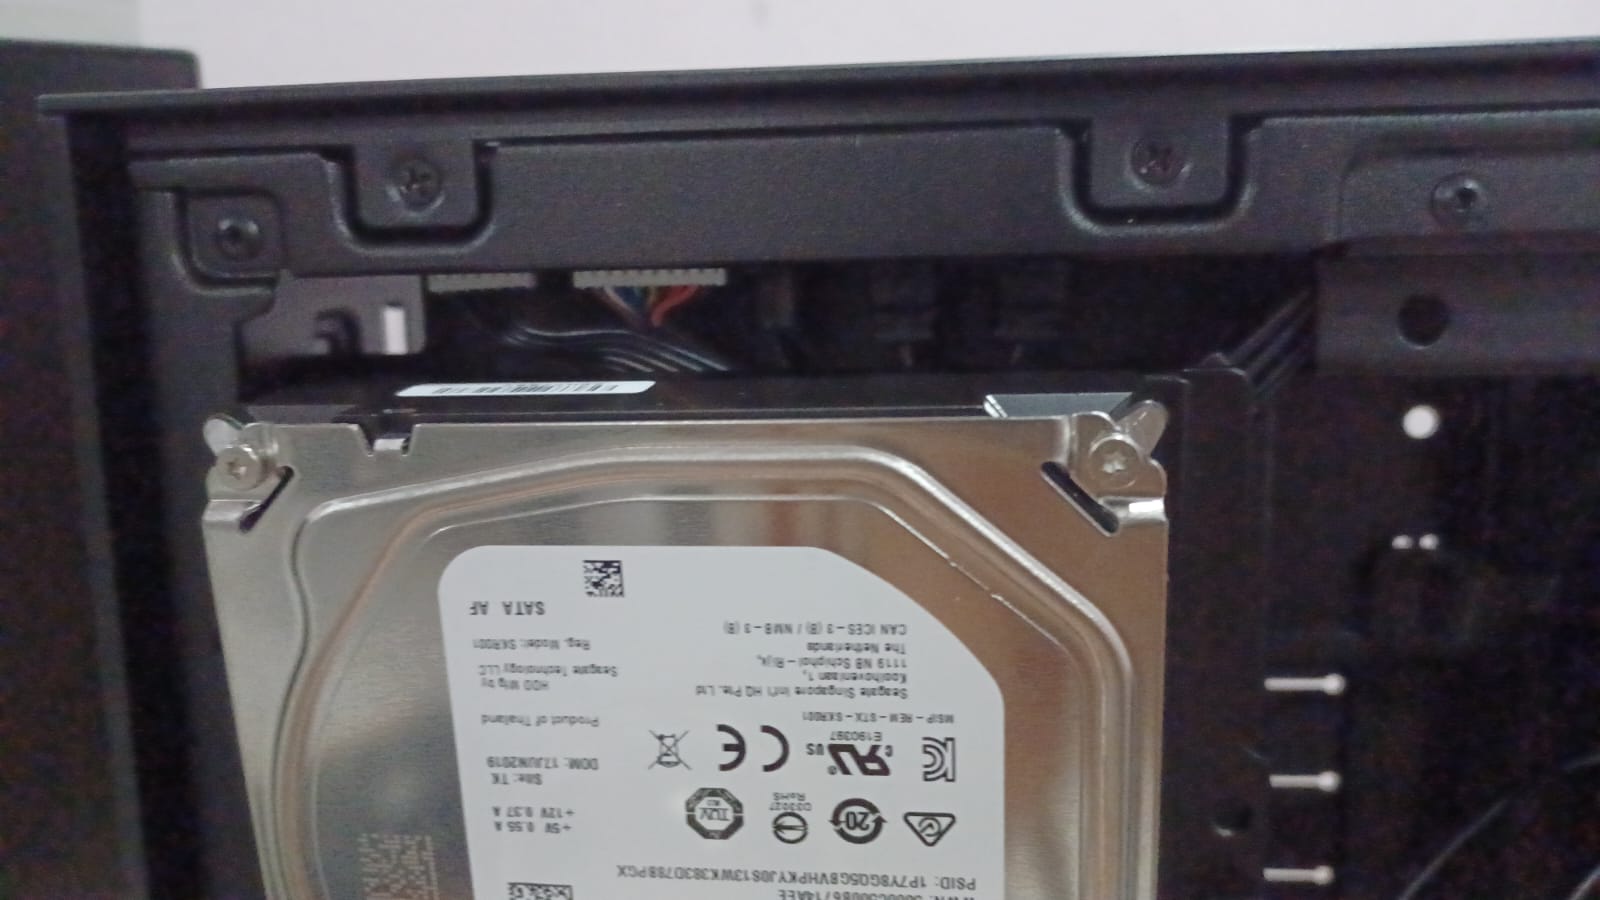
I had to resort to rotating the 3.5” drive so that it protrudes to the right to create sufficient clearance. I reused a disk caddy from my DS918+ to help secure it in place. It’s not pretty but works for now.
In hindsight, I should have got a different case designed to be used with 3.5” drives.
Update: a few weeks after I published this post, the specifications for the case were updated to mention that it only fits 3 3.5” drives.
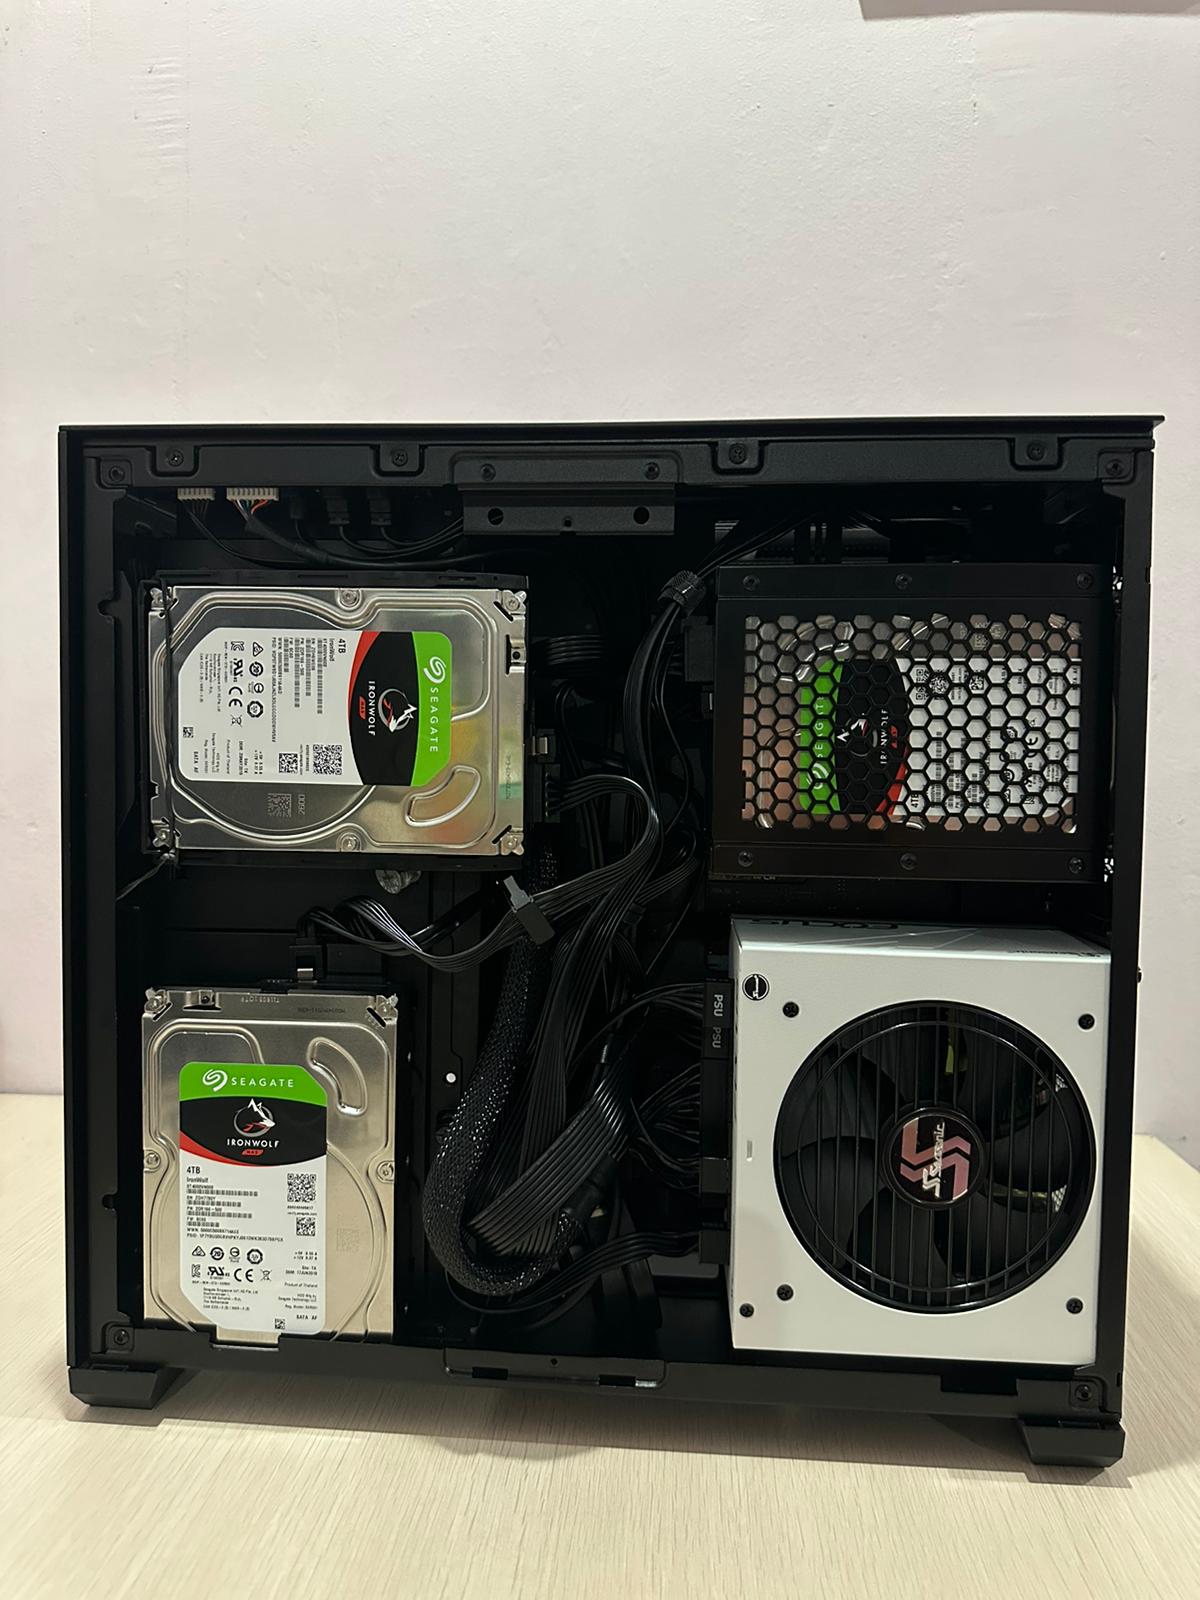
Power Supply: SeaSonic FOCUS GX 750 W 80+ Gold Fully Modular ATX
A 500W or 600W power supply would have been more appropriate, but it was easier and cheaper to buy a larger power supply.
I worked my way down the PSU Tier List. I got the SeaSonic FOCUS GX 750 W 80+ Gold because it was the first thing I found on tier A that was available locally, was reasonably priced at S$166.32 and came with a 12-year warranty.
I only learned later that power supplies aren’t that efficient at lower loads. Had I known, I might have gotten a power supply that works more efficiently at lower loads from the PSU Low Idle Efficiency Database.
CPU Cooler: Noctua NH-D15S chromax.black
Since this was my first time building a PC, I didn’t know how much cooling I needed. Hence, I went straight for Noctua’s best air cooler and got the Noctua NH-D15S chromax.black for S$144.82. That turned out to be overkill for the Ryzen 5700G, but I’m not too upset since it can always be reused for a build with a more powerful CPU.
Memory: Crucial Pro 64 GB (2 x 32 GB) DDR4-3200 CL22 CP2K32G4DFRA32A
ECC memory would have been ideal. Since I was in a hurry, I shelved the idea for a future build as I didn’t want to spend the extra time to look for a platform with ECC memory support.
RAM is a commodity nowadays, so I just got something that used standard JEDEC timings from a reputable manufacturer. I didn’t plan to overclock the memory. I got this Crucial kit for S$185.71.
Hard Drives
I’m reusing the four 4TB Seagate Ironwolf drives that were in my DS918+, so I’m not including them in the overall price of the build.
Summary
Here’s the parts list on PCPartPicker.
| Part | S$ |
|---|---|
| AMD Ryzen 5700G | 271.44 |
| Asus ROG Strix B550-F Gaming WiFi II | 254.61 |
| Lian Li O11 Air Mini | 146.6 |
| SeaSonic FOCUS GX 750 W 80+ Gold Fully Modular ATX | 166.32 |
| Noctua NH-D15S chromax.black | 144.82 |
| Crucial Pro 64 GB (2 x 32 GB) DDR4-3200 CL22 CP2K32G4DFRA32A | 185.71 |
| Total | 1169.5 |
Assembly
Assembling the parts was an educational experience. I got help with some of the smaller fiddlier bits. I wasted a day trying to figure out why the system wouldn’t boot, only to find out that it was caused by an unconnected power connector on the motherboard. I didn’t realize how much force was required to lock the ram sticks into place; the advice online was “use more force than you think is safe” which turned out to be accurate. USB 3.0 type A headers on the motherboard are a pain to work with, since it is easy for cables to get stuck in the header.
Besides the problems with installing the 4th 3.5” hard drive into the case, I was pretty happy with the result.
Was DIY Worth It?
Here are the DS923+‘s tech specs for reference.
Though I ended up spending more than what the DS923+ would cost, the S$390 extra got me the following:
- A much more capable CPU
- 60GB more RAM
- Not being limited to Synology’s DSM operating system
- An ATX motherboard with much better I/O and expansion options
- Much better value per dollar spent
- Ability to make repairs and upgrades as needed
Getting a prebuilt NAS like the DS923+ has the following advantages:
- Ready to use out of the box, no research to select parts and assembly needed. I severely underestimated how much effort and time this would save me
- I would have gotten a working NAS much more quickly. I waited 2 weeks for all the parts to arrive, since it was cheaper to buy some of them from Amazon US and have them shipped to Singapore. Yes, electronics in Singapore are that expensive
- Smaller footprint and less power consumption
- DSM operating system is user friendly and a significant differentiator for Synology
I felt that a DIY build was worth it for me. Most of the stress was from learning how to select parts to build a PC for the first time, which won’t be an issue for subsequent builds. I also didn’t use the Synology apps with my DS918+, preferring to selfhost open-source alternatives, so it didn’t make sense to pay the Synology tax.
Operating System
I considered Proxmox for its better virtualization support but ultimately decided on TrueNas Scale. TrueNas uses the ZFS file system, which works best when running on bare metal. Virtualizing TrueNas is also not for the faint of heart.
Installing TrueNas Scale was pretty straightforward. The GUI is pretty good and makes most common NAS tasks easy.
I use Docker to run applications. However, TrueNas Scale doesn’t support Docker natively, requiring the use of the third party Jailmaker script to spawn systemd containers. This will no longer be necessary in a few months when the next version of TrueNas Scale is released with native Docker support.
After 2 months, I’ve started to chafe under the restrictions caused by using TrueNas Scale. TrueNas Scale is an appliance, so users are not meant to make changes like installing system packages in case it breaks the system. The virtualization support technically exists but is woefully inadequate when compared to Proxmox. Hence, I plan to revisit Proxmox again and explore virtualizing Ubuntu with the Cockpit plugins for NAS purposes.
Power Consumption
The entire system idles at 24W measured from my UPS, an excellent result considering that each of the 4 3.5” hard drives idles at 4W. The CPU idles at 4W.
Most of the difficulty of the part selection process was finding parts that idle efficiently and allow the CPU to enter power saving states. This mainly came down to picking components that would support ASPM, a power management mechanism for PCIe devices to save power when idling. ASPM support was also something I had to enable in the BIOS, as it was turned off by default.
Mistakes
I would make the following changes if I could redo this build.
Case
My problems with the O11 Air Mini didn’t end after installing the hard drives. The 2 3.5” drives below the front I/O panel don’t have airflow to them and run at 45 - 50 C depending on load. The other 2 drives with better airflow run in the 40 - 45 C range. The drives are rated to operate till 60 C, but I’m still worried about the elevated temperatures shortening the lifespan of the drives.
I should have gotten a case better suited for a NAS, even if it meant a bigger footprint. I should also have considered spare drive slots so that I can burn in new drives without replacing any of the existing ones or install drives as hot spares.
CPU Cooler
I would have gone with a smaller and cheaper cooler, or I might have even gotten away with using the stock cooler that came with the Ryzen 5700G. This would have brought down the build cost considerably.
PCIe Bifurcation
I planned to use the main x16 slot with an X16 to 4 port U.2 card to install 4 U.2 SSDs. The 2.5” U.2 form factor allows for much higher capacity SSDs than M.2 since they are larger. Used enterprise U.2 SSDs are also usually cheaper than normal M.2 consumer drives, have much better write endurance and sustained performance.
Using the x16 slot to install 4 SSDs requires the motherboard to support x4/x4/x4/x4 PCIe bifurcation, which splits the 16 lanes in an expansion slot to support 4 devices with 4 lanes each. However, I didn’t realize that Ryzen APUs like the 5700G only support x8/x4/x4 bifurcation. This means that only 3 SSDs can be installed in the x16 slot, and 4 PCIe lanes would be wasted. The wastage of the 4 lanes is so painful because consumer CPUs already have so few PCIe lanes to work with.
Future Build Ideas
I have some ideas for the next build once I have more space available.
Server Platform
A server grade platform is more expensive but has some very nice features not found on consumer platforms.
- IPMI remote management: server motherboards support IPMI, which allows remote management of the system. When changing BIOS settings or installing an operating system, I have to connect a monitor and keyboard just to do this and disconnect them afterwards, which is incredibly inconvenient. These are tasks that can be performed over the network via IPMI.
- ECC memory: although some consumer platforms like AMD’s desktop processors support ECC memory, the quality of the support varies depending on implementation. For example, some platforms may not allow for corrected memory errors to be reported to the kernel. ECC support is ubiquitous in Server platforms.
- More PCIe lanes: consumer CPUs currently top out at a paltry 28 lanes, with 8 lanes typically going to onboard M.2 storage. There aren’t enough lanes for me to install a graphics card for running LLMs locally, additional SSDs and faster networking simultaneously. Since I expect the cost of NVMe drives to decrease over time, I’ve started looking for a platform that would have enough lanes to accommodate more NVMe drives.
- PCIe bifurcation: this is a standard feature in server motherboards, which usually bifurcate down to x4.
I currently have my eye on AMD’s 8 or 16 core Epyc 8004 Siena processors which are very power efficient and have 96 PCIe lanes of connectivity. These processors and their accompanying SP6 motherboards are still expensive now because they are new, but I expect them to become practical options in a few years.
Server Rack
As I get more devices, a rack starts making sense for space efficiency and organization. I currently have lots of vertical space that I can’t use.
Chassis
96 lanes of PCIe connectivity are way more than I can imagine needing. I would still want to use a chassis that is able to take advantage of as many lanes as possible. This probably means some sort of rack mounted 4U chassis supporting 120mm fans for less noise with a mix of 2.5” drive bays for fast U.2 NVMe storage and 3.5” drive bays for SATA.
I don’t have any ideas of a suitable chassis that are reasonably priced, hit me up if you have recommendations. The used server parts market is non-existent here in Singapore, so I’d have to pay a lot for shipping to buy something from overseas.
Conclusion
Despite the challenges and occasional missteps, the process of building a DIY NAS was very rewarding. My new NAS is more powerful, expandable and repairable than a prebuilt. If you’re considering doing something similar, do your research, don’t be afraid to make mistakes and enjoy the process.
I’m already looking forward to having more space available for the next build, stay tuned for the accompanying blog post.
Epilogue
Find out how this has worked for me in this follow-up post on The Real Cost of a DIY NAS.